Your Source For Stock Show News
Sullivan’s Adhesive | Tips from Stock Show University®
When you think about comparing livestock adhesives to anything, think about the hairspray that is in your bathroom at home. In order to have your calf fit to perfection for the show ring, you need your animal’s hair looking flawless. Even though you are not putting adhesive in the body hair, the areas of the legs, flank, belly, and tailhead will be areas where adhesives can be used.
From Sullivan Supply®, there are two types of adhesives that we recommend to our trusted customers: Tail Adhesive and Prime Time Adhesive. When comparing the two adhesives, Tail Adhesive is the highest strength adhesive. It has unmatched holding power for flat lying, hard-to-hold hair on legs and when shaping the tail ball. You can depend on Tail Adhesive to dry completely and hold its firm shape in all types of weather, with no fall-down when Touch-Ups are applied. Prime Time is our strongest show day leg adhesive with holding power that is ideal for medium length, thinner hair types. It creates body and volume with a clear, natural look. Prime Time will also perform in all types of weather such as winter, spring, summer, or fall. It holds hair firmly in place and will not “wilt” or fall down in humidity. Sullivan’s Prime Time is formulated lighter, is more flexible and clear in a pure form of adhesive. No matter which adhesive you are using, a rule of thumb is—less is more when applying adhesive. Spraying too much adhesive on the area you are fitting will make fitting more difficult for you to clip. It is easier to gradually add more adhesive to an area if needed.
Having said that, if you are just learning to fit, Prime Time Adhesive might be your go-to product as it is lighter and more forgiving. For more experienced fitters, we recommend that Tail Adhesive is your go-to product on show day.
For more tips and video tutorials, visit https://www.sullivansupply.com/stock-show-u/
For more tips and video tutorials from Stock Show University®, visit https://www.sullivansupply.com/stock-show-u/online/
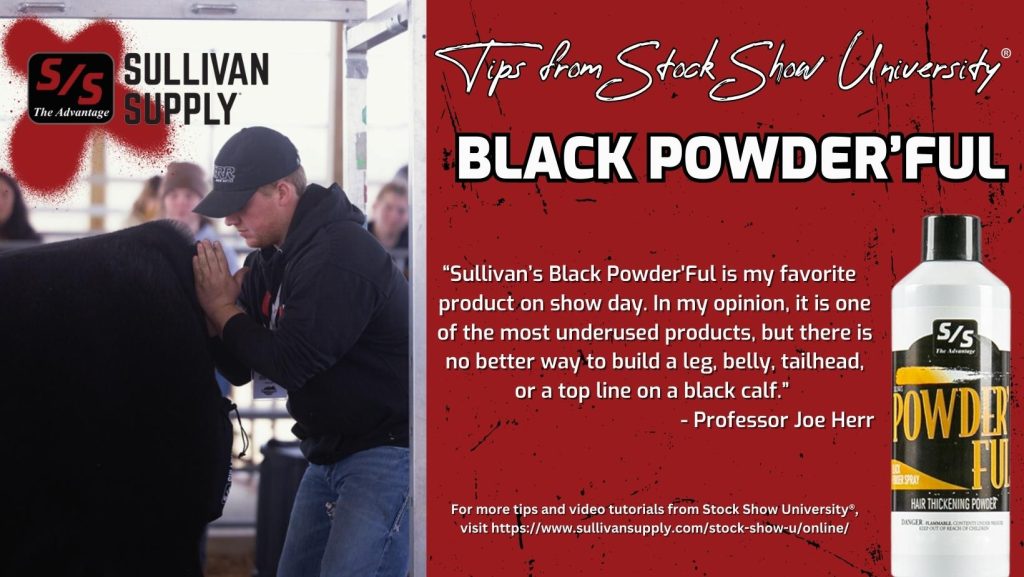
Black Powder’ful | Tips from Stock Show University®
For more tips and video tutorials from Stock Show University®, visit https://www.sullivansupply.com/stock-show-u/online/
Step 1: Setting Goals | Tips from Stock Show University®
Whether you have exhibited livestock for years or you are just a beginner, working towards some type of goal in the show barn is an excellent idea to stay motivated and achieve greatness. For a beginner, you might have the goal of winning showmanship at your local county fair. Once you have been in the project for more years, you might add the goal of exhibiting at a Junior National Heifer Show or making the Sale of Champions. After this or when your time expires in the show ring as a junior, you might have the goal of starting your own herd and raising livestock for junior exhibitors.
When setting this “goal” you have at home, remember this special piece of advice. You might have heard the old saying, “It’s a marathon, not a sprint.” Your goals and aspirations will not happen overnight, but with constant hard work and dedication, goals can become reality. Now, if your goal is to win first place, well, that may not be totally in your control, at the end of the day. The lessons and skills learned as you work toward your goal will be invaluable. During this Stock Show University® article, Stock Show University® Manager, Tess Mittag, sat down with a highly motivated showman, Payton Rodgers, as she explains how she got started in this industry and what keeps her motivated in her show barn!
Tess: Tell Stock Show University® a little about yourself.
Payton: My name is Payton Rogers, and I am 16 years old from Savannah, MO, where we run our family business, Rodgers Livestock, with a focus on raising and selling show cattle. Our family is very active showing cattle, pigs, and sheep around the country. Following high school, I plan to attend a Junior College and judge on a Livestock Judging Team. After that, I plan to attend Oklahoma State University and get a degree in Agribusiness and Marketing. My goal after graduating from college is to find a career in this industry that I grew up heavily involved in.
Tess: How old were you when you first started showing?
Payton: As long as I can remember, I have had a love and passion for this industry. I believe part of that came from growing up around our family business and seeing my parents help other kids with their livestock. I first started showing pigs when I was 5 years old. Furthermore, I then started showing cattle at jackpot shows when I was 8, but it wasn’t until I got into Junior High that I finally showed my first fat steers.
Tess:What keeps you motivated day to day in the show barn?
Payton: “The only thing even in this world is the numbers of hours in a day. The difference between winning and loosing is what you do with those hours.” This quote has always been written on the whiteboard in the barn. In my mind, I have always thought that if I can give showing and working on livestock my all and work as hard as I can, no matter if I win or loose, at least I will know I did everything I could. A lot of my motivation comes from wanting that feeling of walking into the ring knowing I have done everything I could do. I have also been very fortunate to be surrounded by people who support and encourage me to keep pursuing and working towards my goals. I am very thankful for them and their constant reminder to never give up. However, one of the biggest ways I stay motivated is by using disappointment as motivation. Not everything is going to go the way I envision. So, instead of getting upset or giving up on a goal, I have to find the positive with what I’m doing, learn from coming up short, and use it as motivation to work harder to accomplish my goals.
Tess: What advice would you give to a young kid that was just getting started with their livestock project?
Payton: If you are a kid that is just starting showing, I first would like to tell you that there is no better industry to get involved in. Showing livestock comes with hard days but as I look back growing from those days has made me the person I am today. I would also tell you that the possibilities and opportunities that come from this industry are endless. If you are passionate about showing and put in the work, you can do anything you set your mind to. However, in order to do that, it is important to be willing to be open-minded about always learning new things and making new connections. Another thing I would tell them is that everyone always says time flies and to enjoy the present, and that is so true. That realization has started to set in as my last few years of showing approach. Enjoy each moment, even some hard days will become the best days of your life.
Tess: Who are your role models in the industry, and why do you look up to them?
Payton: I wouldn’t be where I am at today without the influence of countless people who have done so much for my family and I. However, the people I look up to the most would have to be my parents, Blaine and Melissa Rodgers. I look up to them in so many ways. They have sacrificed so much to allow my sister and I to grow up in this industry. They have always taught us that no matter what, dream big and work hard. Our family does this as a team, as my parents both put in so much time and effort helping my sister and I, and there is no way we could ever do it without them.
For more tips and video tutorials from Stock Show University®, visit https://www.sullivansupply.com/stock-show-u/online/
Choosing The RIGHT Whip | Tips from Stock Show University®
Whips come in many styles, simply because every pig is different. It is essential to practice with different types of whips to see how each pig reacts, just let test-driving a vehicle before you buy it. What is perfect for one pig might turn into a failure for another. It is likely that you will need a different whip for each pig that is in your show barn. When training at home before the show, be calm and patient, learning the tendencies of each animal. Initially, the pig will respond best to a stiff whip rather than a soft, high flexing whip. A higher flex whip can be used as the animal progresses and is more trained. Most hog exhibitors prefer a high flexing whip, as it allows the popper to swing under the jaw to keep the head up and alert.
During this tip from Stock Show University® article, we will quickly break down each of the whips Sullivan Supply offers and what purpose they are designed for:
- Alpha Whip – The Ultimate Show Day Whip for well broke animals. The extreme level of flex creates tremendous response, with light taps to keep the animal’s head up. This whip comes in the options of Flex, Super Flex, or Extreme Flex.
- Heads Up Whip – Show day whip for well broke animals. The tassel tip offers a softer touch mechanism for fewer markings
- Driver Whip – Show day or at-home training whip for the more difficult, hard-headed animal. The mid-fex stiffness delivers stronger pressure contact. Tip: The harder the animal is to control, the stiffer the whip should be.
- Balance Whip – The do-everything, everyday whip for at-home training of all animals and the show day whip for the slightly more difficult behaving animal.
- Carbon Fiber Whip – Show day and at-home training for lesser trained, hard-headed animals. Also, great for use by a young/smaller stature person that needs a stronger whip shaft.
- Carbon Fiber Heads Up Whip – Show day and at-home training for lesser trained, hard-headed animals. Also, great for use by a young/smaller stature person that requires a stronger whip shaft to help control the animal. Tassels prevent red marks.
- Classic Whip – At-home work on better trained, well broke animal. The high flex shaft works well to train the animal to keep their head up while driving.
- Head Trainer – Use as a training tool on the most difficult, down-headed animals. The aluminum tubing teaches the animal to raise their head.
For more tips and video tutorials, visit www.sullivansupply.com/stock-show-u/
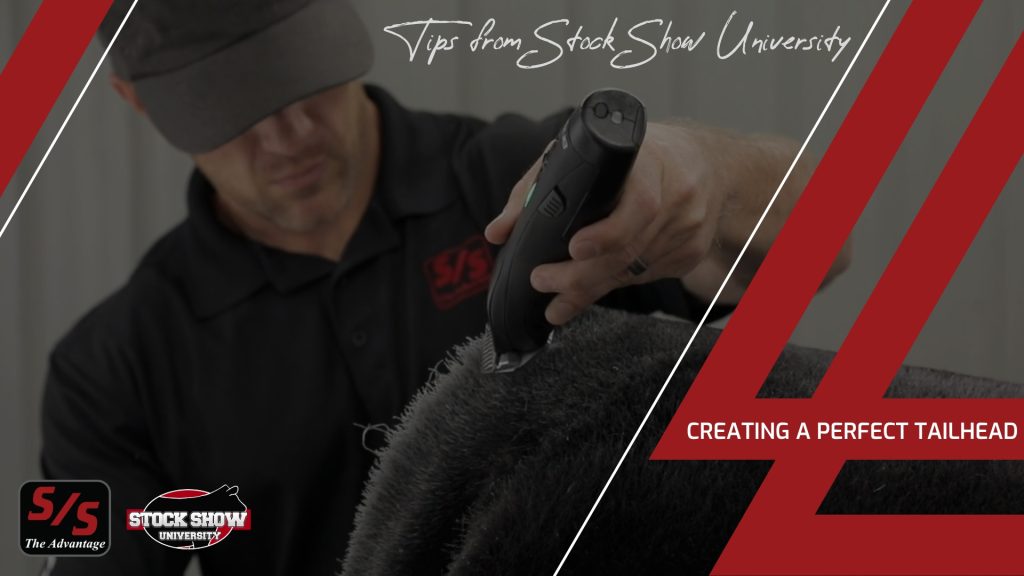
Creating a Perfect Tailhead | Tips From Stock Show University
It is show day, and you were just informed that you are in charge of fitting a calf’s tailhead. Even though you may know the basics of fitting a tailhead, Stock Show University is here to give you a quick refresher of the steps to create a perfect tailhead on a calf.
Before you start fitting the calf’s tailhead on show day, Stock Show University recommends clipping the tailhead close to the way you want the finished product to look before you start fitting. Just like fitting any other part of a calf, fitting a tailhead will vary from calf to calf, so make you analyze the calf before you start fitting. After all the clipping is done, it is time to apply the adhesive. Remember when choosing a Sullivan’s adhesive, Sullivan’s Tail Adhesive is our strongest adhesive and Sullivan’s Prime Time is our lighter adhesive option.
Once you have clipped the tailhead, use a Sullivan’s Tefflon Comb or metal comb to comb through and separate the hair follicles on the tailhead. This is important you do before you start applying adhesive to the tailhead. The tailhead is one of the few spots on a calf where you want to limit combing after applying a product. We stress this advice because once there is adhesive on the tailhead, combing may increase clumping the tailhead tails together, creating an unnatural, less clean look for your finished product. If you are going to be combing through it, we do recommend using a slicker brush, as the teeth are better to break up the hair more.
When applying Tail Adhesive or Prime Time Adhesive, you are going to use the same concept when fitting the legs of a calf—less is more. Little, light sprays of the adhesive on both sides of the tailhead will help you create your perfect tailhead other than spraying a lot on at once. You’ll also want to spray towards the back of the calf from the hip so that any extra product is going away from the calf verses on the calf’s topline.
After the adhesive is applied, you will move directly behind the calf and use your fingers (preferably your two pinky fingers) to gather and smooth the hairs on the tailhead. You will want to stand directly behind them to make sure the calf’s tailhead is fit in line with the rest of the body—not favoring one side over the other. After you have shaped the tailhead with your fingers and the adhesive is dry, spray a light amount of Sullivan’s White Powder’ful over the tailhead – just like you sprayed the adhesive. The Powder’ful will act as a guide to help you visually see what needs to be clipped off or cut off with your fitting scissors after the tailhead is pulled up with the adhesive.
When shaping the tailhead, the goal is to have the tailhead shaped in a soft curve—not a complete 90-degree point. Choosing to clip or use a pair of scissors to shape the tailhead is the personal preference for each fitter. Several Stock Show University Professors give the advice that they do use clippers, but scissors will allow you to have more control when shaping the tailhead verses a pair of clippers—creating a sharper appearance on the finished product.
After the tailhead is all shaped, and you believe it is done, use the touch-up paint color that matches your animal. For example—If the calf that you just fit is black, you will paint the tailhead just like you would paint a black calf’s legs—starting with Jet Black and then finish the leg with Sullivan’s Black Finisher.
For more tips and video tutorials on fitting, visit https://www.sullivansupply.com/stock-show-u/online/.
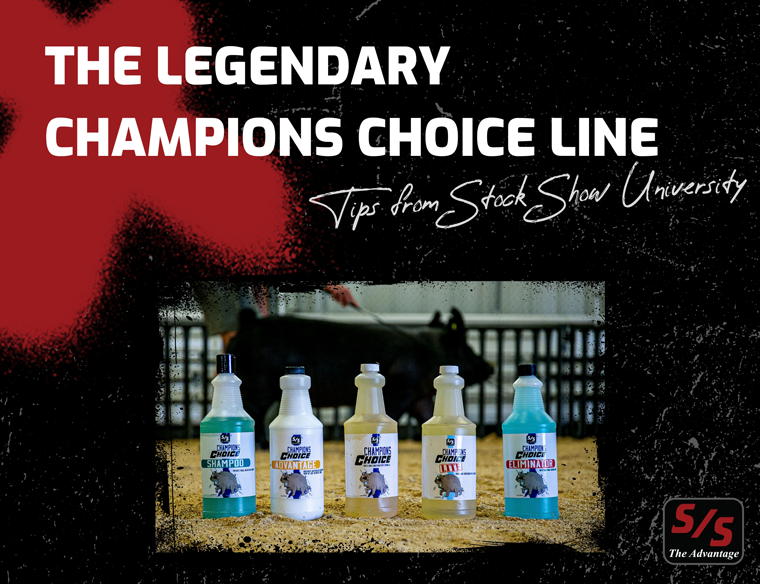
The Legendary Champions Choice Line | Tips from Stock Show University
Daily care is a critical component when it comes to any livestock that might be in your show barn, including pigs. Within this Stock Show University tip, we will be covering the differences between the five Champions Choice products that Sullivan Supply carries and how they can fit into your daily care routines at home, at a show, or after the show.
Champions Choice – Sullivan Supply’s best-selling skin and hair conditioner for pigs. This product is an excellent daily skin care product that will aid in making pale skin pigs darker.
Champions Choice Lite – Sullivan’s Champions Choice Lite is a refined version of the original Champions Choice. Champions Choice Lite still contains as of the great conditioning ingredients as the original product offers, plus aiding in making pale skin pigs darker. Champions Choice Lite works best on days that exceed 80 degrees outside temperature. This product also guarantees that it will not clog the animal’s pores compared to other heavy oil products. Also, Champions Choice Lite contains Citronella, which is a natural insect repellent.
Champions Choice Advantage – Champions Choice Advantage forms an anti-microbial barrier of protection against mange & mites while conditioning the skin and hair of swine. It replaces essential natural oils and prevents dry, scaly skin. Good for sensitive skin animals and is excellent for white hogs. To use properly, apply this product all over the entire animal and brush in thoroughly after washing with shampoo. For the best results, use in conjunction with Champions Choice Skin and Hair Conditioner.
Champions Choice Shampoo – The Champions Choice Shampoo was designed to control mange & mites by preventing fungal and bacterial growth. This product is a safe, effective antimicrobial shampoo that replenishes and moisturizes the skin. Like the other products in the Champions Choice line, Champions Choice Shampoo contains a natural essential oil insect repellent. To use properly, wet your pig with water. After your animal is wet, lather shampoo over the entire body of the animal and rinse thoroughly. If you are using this product to control mange and mites, use twice per week.
Champions Choice Eliminator – Champions Choice Eliminator is ideal to be used as an after-show prevention of mange and mites on show pigs that have been in contact with other animals. If you encounter an outbreak of mange or mites, Champions Choice Eliminator is great to rapidly clear up those infectious outbreaks. The product becomes active in 30 minutes after application and is long-lasting, up to 24 hours with each application. This product is a very effective anti-microbial product that contains Essential Oils, Copper Ion and Zinc. For the best results, immediately apply Champions Choice Eliminator when there has been contact with outside animals or when removed from their natural environment. Spray over the entire animal and brush it thoroughly. For prevention, use weekly, or more often as needed.
For more tips and video tutorials from Stock Show University, visit https://www.sullivansupply.com/stock-show-u/online/
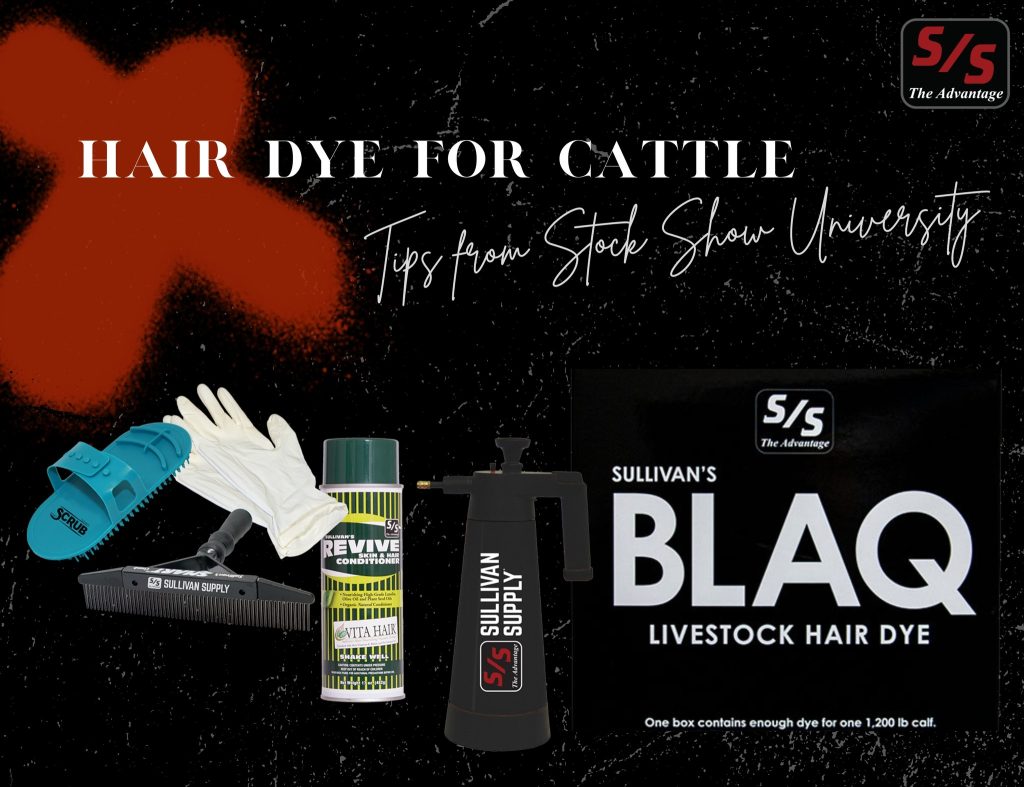
Hair Dye for Cattle | Tips from Stock Show University
Before most shows, one of the items on the to-do list is to dye your animal’s hair. During this Stock Show University Tip, we will be discussing the different hair dye products that Sullivan Supply has to offer, along with tips and tricks on the dying process in your barn.
When choosing a hair dye for your animals, would you like a product that delivers better coverage, a richer hair color, easy to apply, cost-effective, and more gentle when used properly? Sullivan Supply has you covered! For black cattle, refresh your animal’s hair back to a long-lasting, brilliant black with Sullivan’s BLAQ livestock dye. BLAQ, color for black colored livestock. ENVY, color for dark red livestock, and FYRE, color for medium red livestock, were specifically formulated to be a long-lasting dye that, when used properly, won’t irritate the skin and hide of the animal.
Now, that you have a dye purchased, you might be wondering what is the best way to dye your animal. Stock Show University recommends that you start with a clean, dry, and clipped animal—along with you wearing older clothes (even when you do all the steps correctly, it might be a little messy). No oils should be applied to the animal’s hair before the dying process. When prepping your animal, make sure they are tied in a shady area, out of direct sunlight. If you are wanting to dye your animal, and they do have some white on them, spray Sullivan’s Hocus Pocus on those areas to prevent the dye sticking to that part of the hair coat. You also can apply Hocus Pocus to the ear tag as well, so it does not also get stained. If the tail is white, you may grab an AI glove to cover the tail from preventing it from getting mixed with the color dye, or you may use a tail clamp. Lastly, to protect sensitive areas on your animal such as the udder, rectal area, under the tail, etc., spray Sullivan’s Revive on those areas to help avoid irritation.
Once your animal is ready to go, you will need to mix the dye bottle and the activator bottle into a Top Gun bottle and sprayer or a Heavy-Duty Pump-Up sprayer. Directions for mixing are on the dye box, and each kit covers a 1,200 pound animal. Once mixed, put on plastic or latex gloves and spray ⅓ of the dye on each side of the animal, using the remaining ⅓ on thicker haired areas on the animal. If you are dying the tail switch, do that part last, as the animal might switch their tail. Once all the dye is in, let the dye sit on the hair for a maximum of 30 minutes. While the dye is sitting, comb in with an old SMART comb or a Smart Scrub Brush to work the dye into the hair. Note—make sure your comb and scrub brush are oil free before you start combing the dye into the animal. You may also put a fan on them during this process to help the dye set into the hair coat.
Once the dye has been in for 30 minutes, start rinsing your animal until the water coming off the animal is clear. After this, wash your animal with Sullivan’s Volumizer shampoo like normal. Rinse out the soap and dry your animal. Apply Sullivan’s Revive or Revive Lite onto the animal’s hair to help condition the hair as well as bring out a deeper color within the hair. After this process and days after, continue your normal daily care routine with Sullivan’s Revive/Revive Lite and Sullivan’s Kleen Sheen to keep your animal’s hide healthy.
For more tips and video tutorials from Stock Show University, visit https://www.sullivansupply.com/stock-show-u/online/.
Illinois Stock Show University Grad Program | May 5th & 6th
Join us in Galva, Illinois on May 5th and 6th for our two-day Stock Show University Grad Program. Be sure to follow the link below to sign-up!
Sign-up Link: Click Here

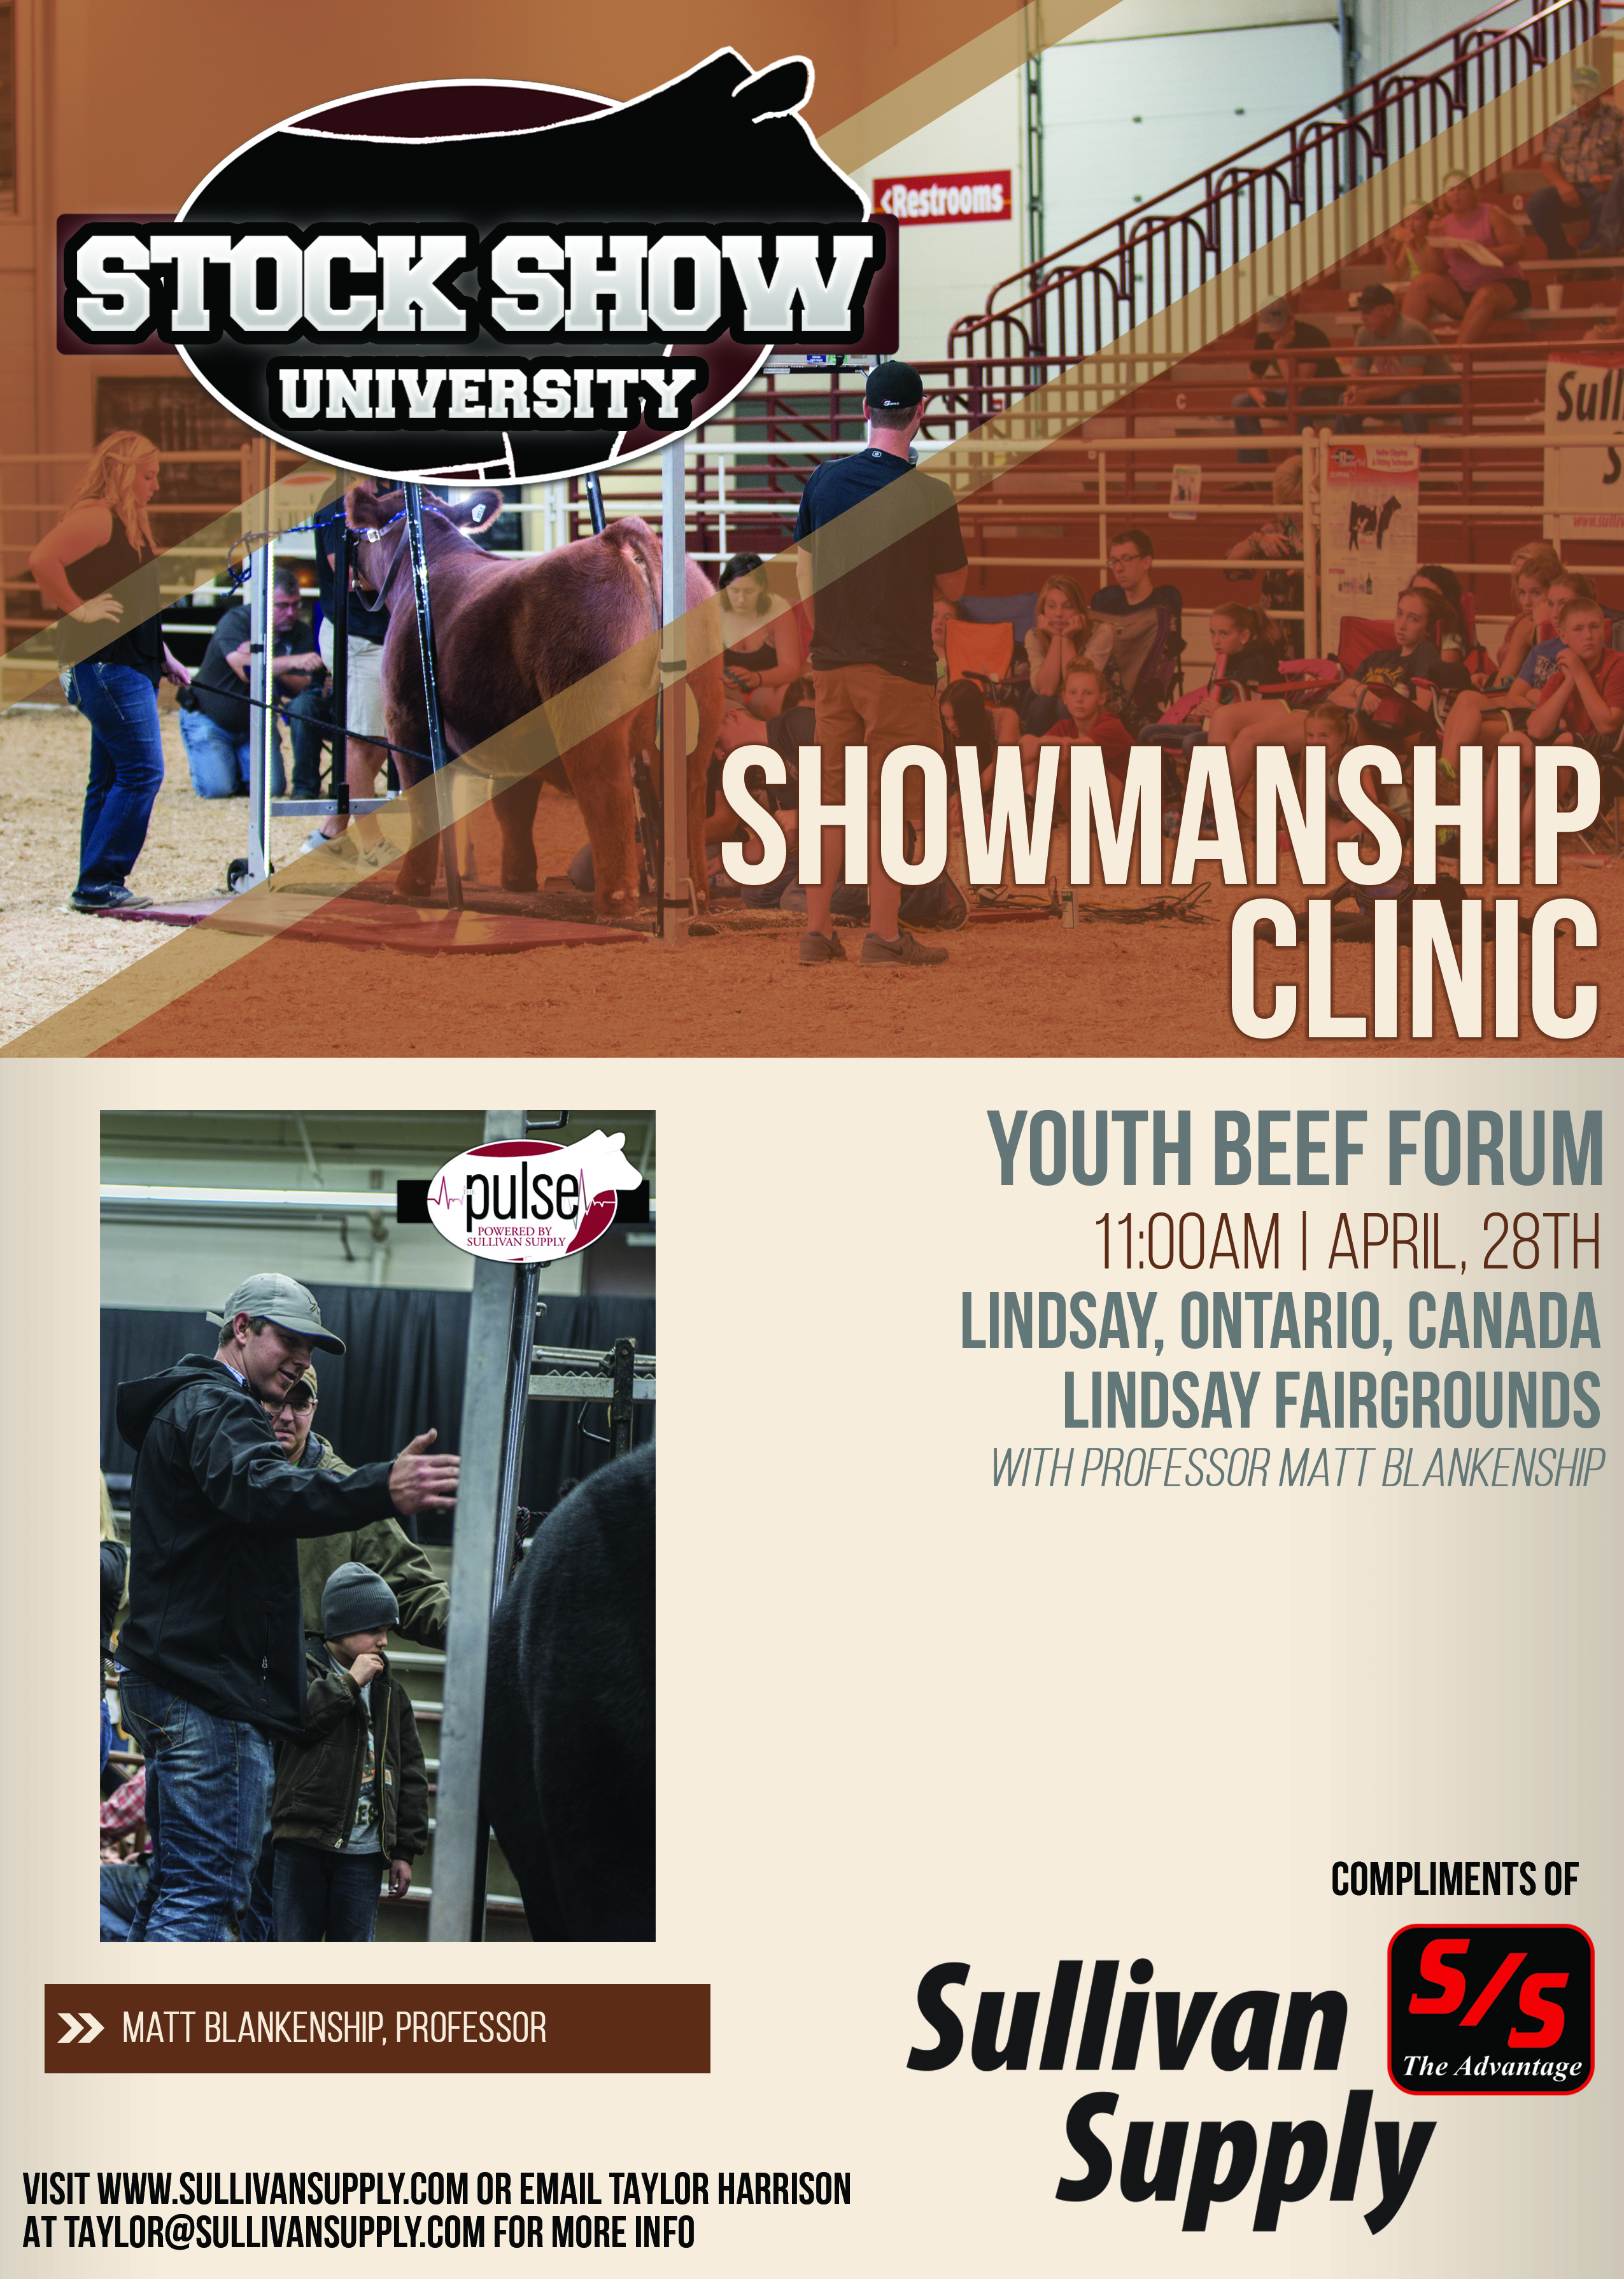
Youth Beef Forum Stock Show University Clinic | Lindsay, Ontario, Canada on April 28th
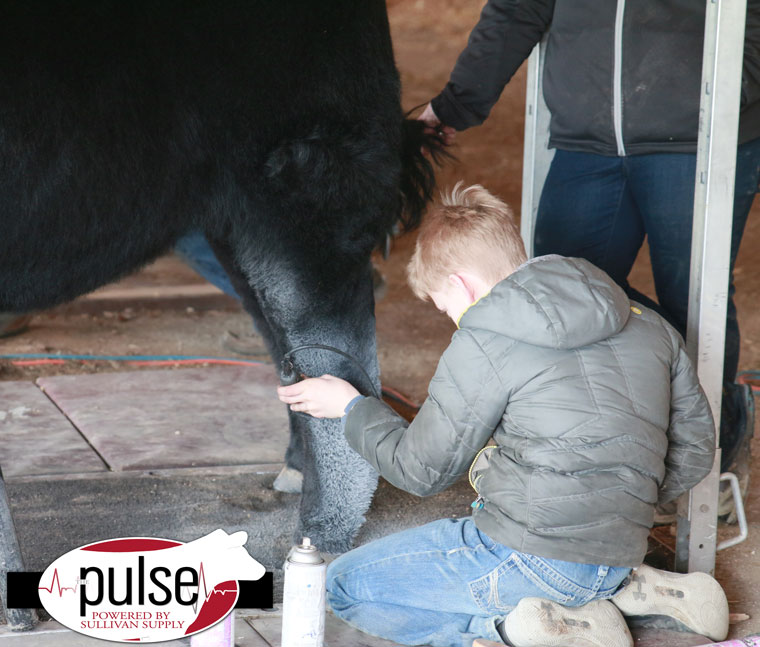
Stock Show University Iowa Grad Program – Day Two
Professor Keaton Otto demonstrates how to clip the correct shape into a front leg.
Master Professor Josh Elder and Deb Vorthmann talk about the proper way to fit and clip a top line and tailhead.
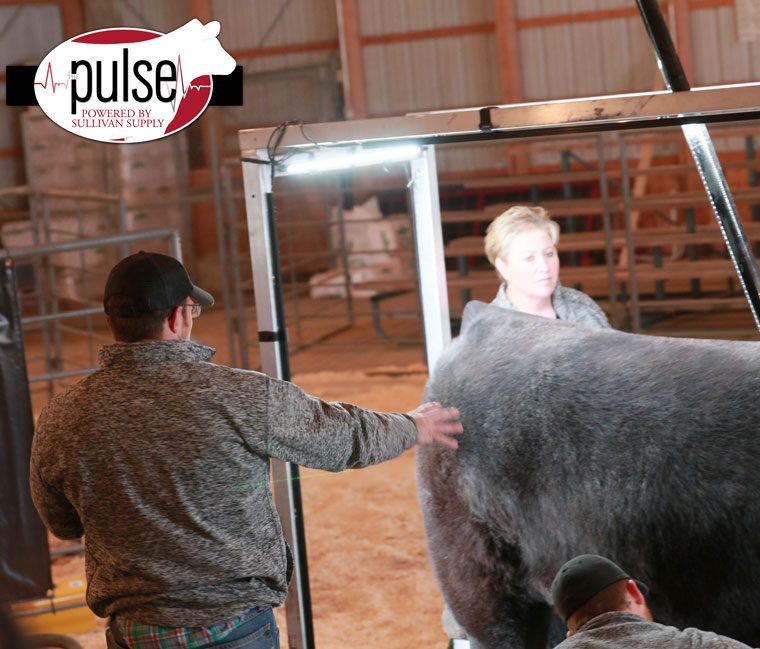
Master Professor Tracey Coffland works with Renne Piekema to understand the clipping techniques on a rear leg.

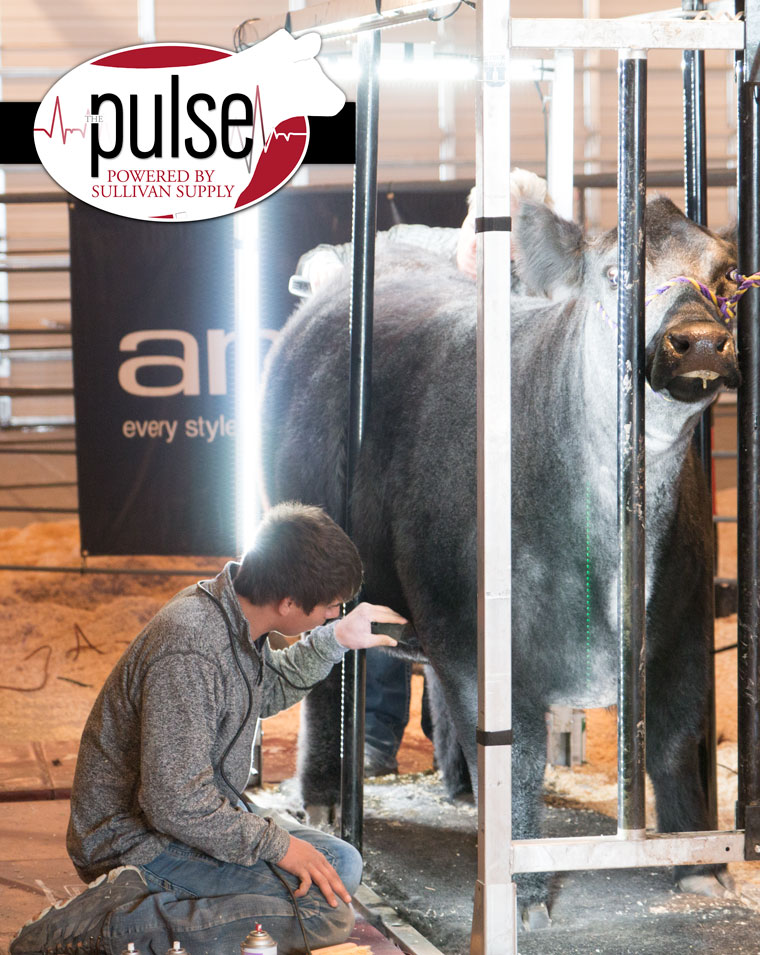
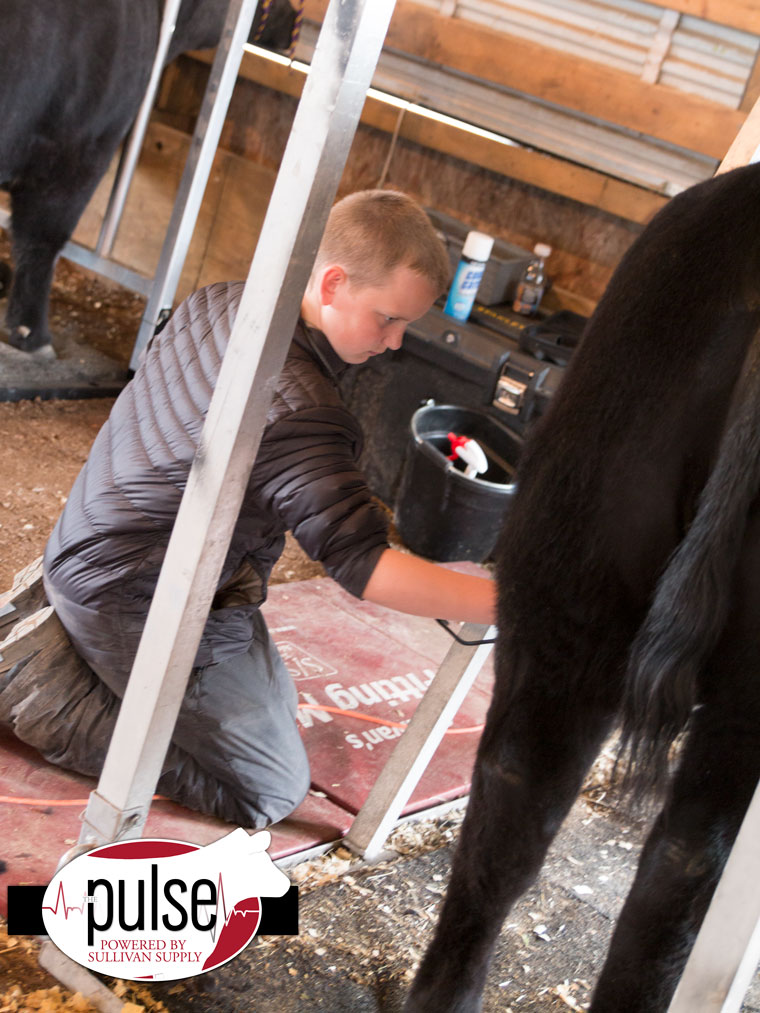
Clayton Walker uses Sullivan’s White Powder’ful to fit the perfect tailhead.
Sam Jordan works on clipping the belly of his heifer.
Bode Drunkenmiller was showing off his skills today. Great Job, Bode.
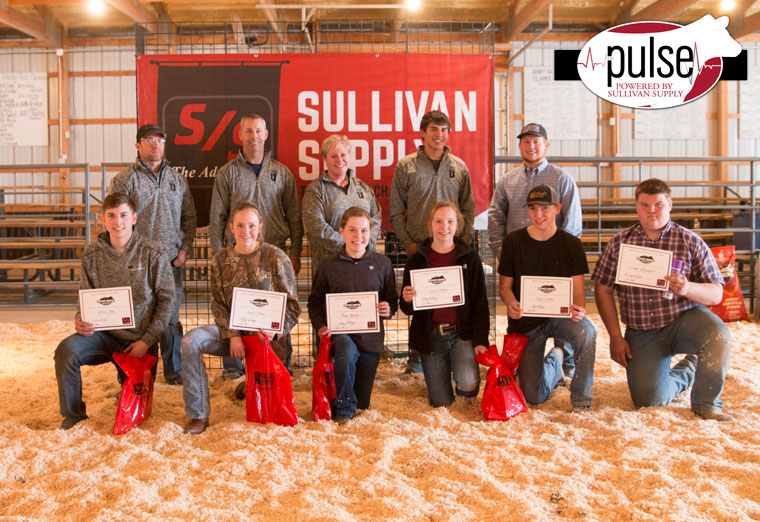
Winners in the 14-21 year old division goes to: Best Fitter: Jenna Reeter, Best Clipper: Clayton Walker, Best Showmen: Logan Rozenboom, Most Determined: Renee Piekema, Most Improved: Pacey Hawkins, GO Getter: Kolton Knopp
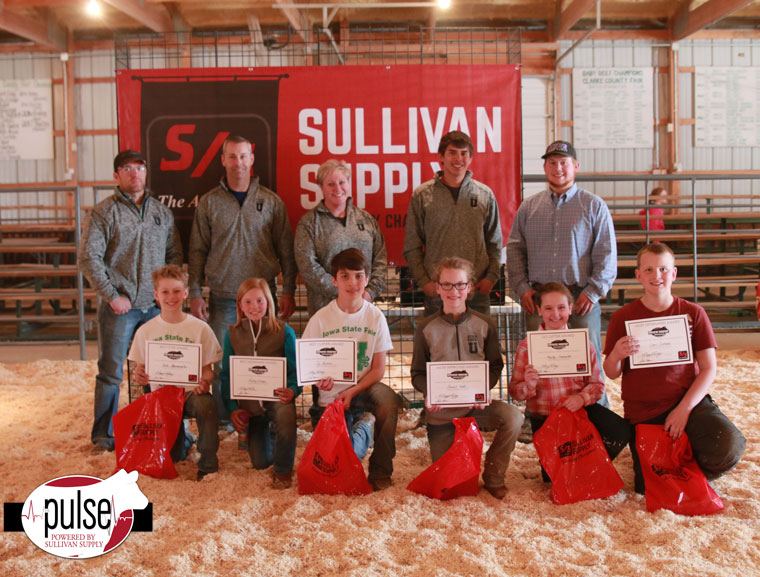
Winners in the 8-13 year old Division goes to: Best Fitter: Bode Drunkenmiller, Best Clipper: Ty Recker, Best Showmen: Aubrey Snuggs, Most Determined: Sam Jordan, Most Improved: Hannah Woods, Go Getter: Kayley Lancaster.